Putting fixtures on truss and stands
Fixtures hang on or stand on the holders you've set up. Drag them onto a holder: they snap on and then move along with it.
Step by step
- Grab a fixture in the 3D view and drag it onto a truss, T-bar, tripod, totem, booth or column speaker. A green frame and “Snaps onto: …” show where it will land.
Drag onto the truss and the fixture snaps in. - Or drag it from the fixture list onto an object in 3D. This also works with several selected fixtures or a whole group (grab the group row).
- On short bars (T-bar, booth), the visualizer then spaces all fixtures evenly.
- On a truss, new fixtures go into the biggest gap.
- It's easier to keep track with “by location” above the fixture list. Every holder then gets its own group with its fixtures, and free-standing fixtures are under “No mount (floor/wall)”. To move a fixture to another holder, drag it onto that holder's row. An empty holder shows “Empty – drag fixtures here”. “Object” in the group row selects the holder itself.
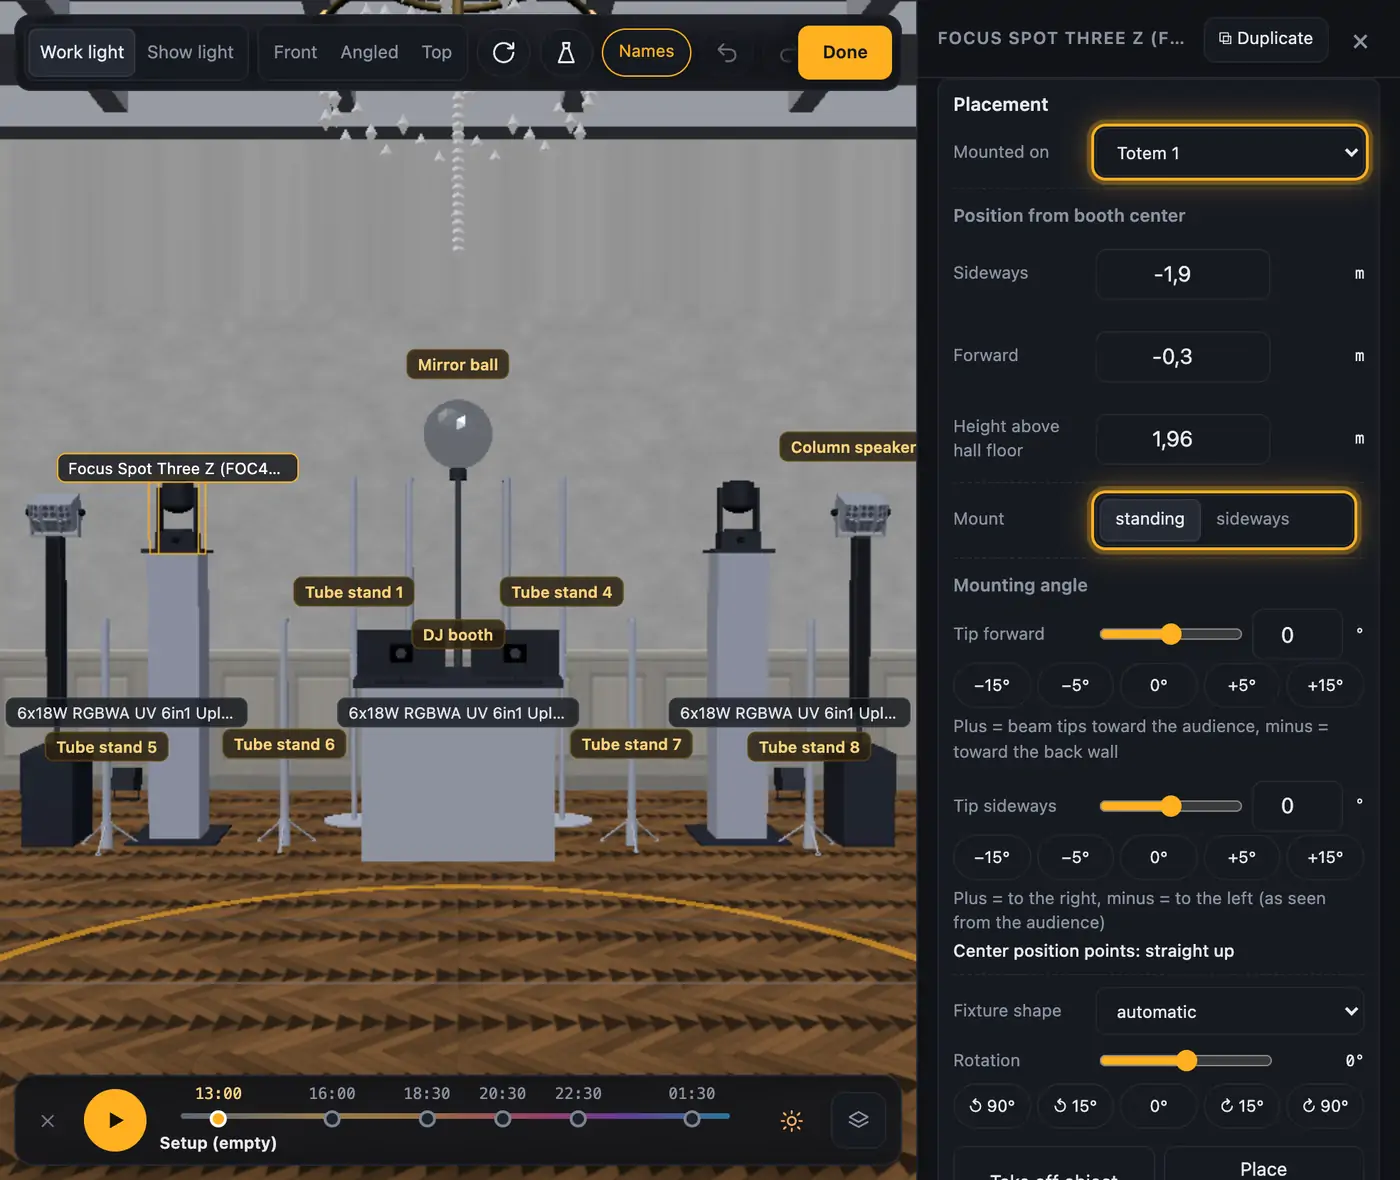
- Click the fixture and set things on the right under “Placement”:
- “Mounted on”: pick another object or “free on the floor”.
- On a truss, “Mount”: “hanging” or “standing”, plus “Position” along the bar. Moving heads can also be mounted “sideways” anywhere. On a stand pair, set “Position” fully left or right and adjust “Height on the tube”. The head then clamps to the stand tube and faces the audience.
- For uplights, bars and lasers, “Aim”: “automatic”, “up”, “forward” or “down”.
- “Mounting angle”: tip the fixture to any angle (see Tipping fixtures and the test beam).
- “Rotation” with the slider or buttons.
- Type exact values under “Position from booth center”, in meters and as seen from the audience:
- “Sideways”: minus = left, plus = right.
- “Forward”: plus = toward the audience, minus = toward the back wall.
- “Height above hall floor”: only for free-standing fixtures, e.g. for a fixture up on a balcony.
- “Take off object” puts the fixture on the floor in front of the holder. “Place automatically” discards your placement, and the visualizer places the fixture itself again.
More from “Fixtures, stage & 3D”
- The workbench: setting up the visualizer with the toolbar on the leftThe visualizer has a new layout: instead of one long sidebar and lots of buttons at the top, there is a toolbar on the left with seven areas. Only one area is open at a time, and the 3D view stays large next to it. At the top you see which location and which setup are loaded, and the search gets you to any function in two seconds.Summary
- Opening and using the 3D visualizerThe 3D visualizer shows your lights on a virtual stage. You see what SoundSwitch or Droplit is sending to your fixtures right now, and you can rebuild your real setup.Summary
- Fixtures & stage in Droplit“Fixtures & stage” is the full 3D visualizer right inside Droplit. This is where you set up your stage and hide fixtures that your shows shouldn't use.Summary
- Choosing the source: SoundSwitch, Designer or test patternAt the top right of the 3D view you choose where the light values come from. You either watch live what SoundSwitch sends to your fixtures, or the preview from Droplit.Summary
- Fixture details and DMX monitorClick a fixture to see its address, its mode and all channel values live. The DMX monitor adds all 512 channels of a universe at a glance.Summary