
Painting pixel zones and controlling single columns
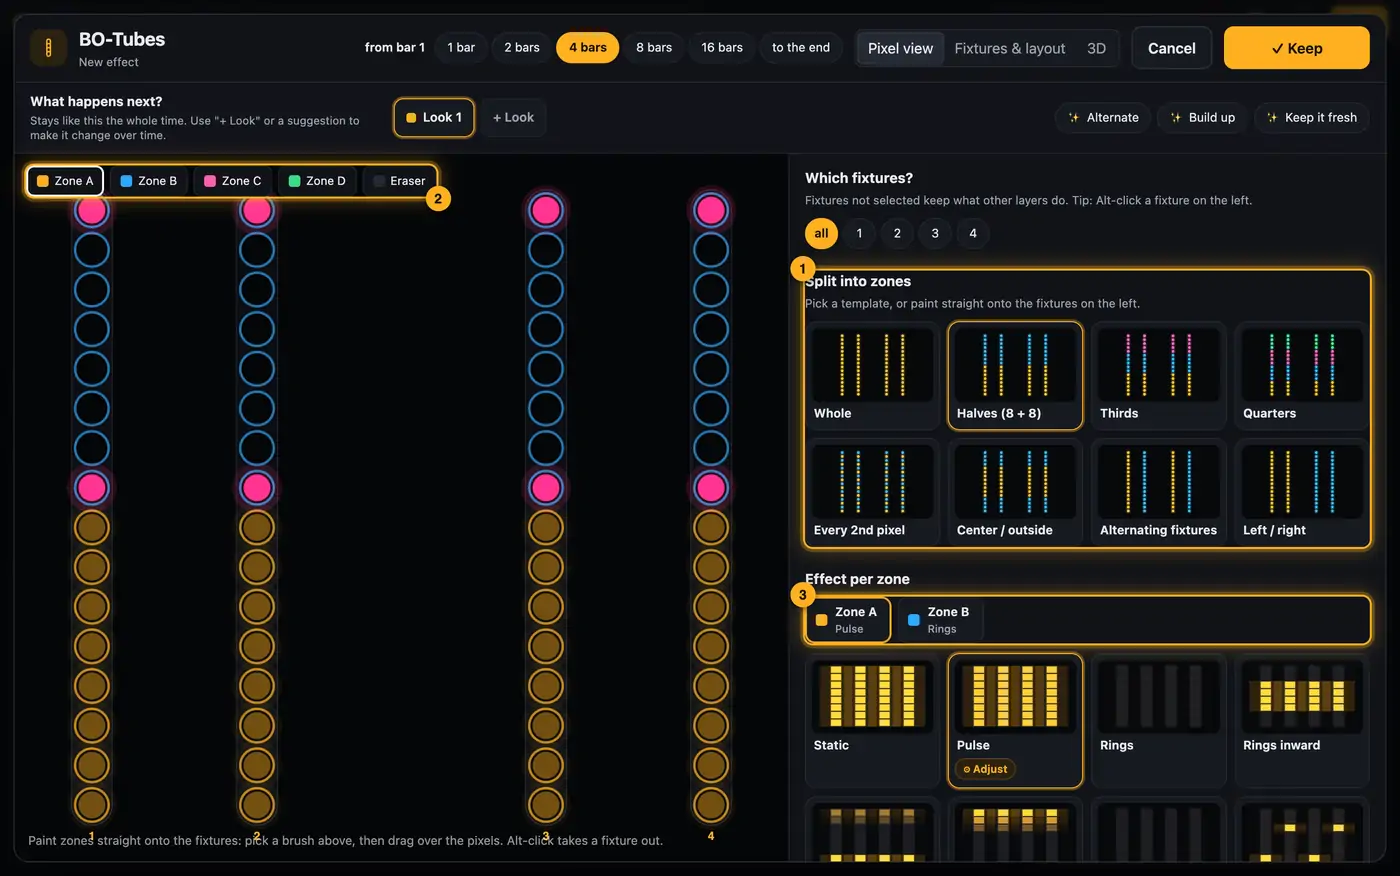
Pixel fixtures like tubes or bars have many cells you can control one by one. In the effect studio you split them into up to four zones (A–D) and give each zone its own effect, e.g. a pulse at the bottom and rings at the top.
Step by step
- Pick a template under “Split into zones” on the right: “Whole”, “Halves (8 + 8)”, “Thirds”, “Quarters”, “Every 2nd pixel”, “Center / outside”, “Alternating fixtures” or “Left / right”.
- Or paint yourself: pick a brush at the top left of the big view (“Zone A” to “Zone D”) and drag the mouse over the pixels of the tubes. “Eraser” takes pixels out of all zones again.
Paint zones directly onto the pixels. - Under “Effect per zone” there's a tab for every zone in use. Tap a zone and pick its effect, e.g. “Pulse”, “Rings”, “Comet”, “Sparkle” or “Flowing gradient”.
- Below that, pick the “Color” (two “Colors” for “Flowing gradient”) and the “Speed”.
- Only some fixtures: under “Which fixtures?” tap “all” or the numbers. Or hold Alt and click a fixture on the left.
- Tap “✓ Keep”.
More from “Effect lanes & effect studio”
- Opening Effect lanes and going back to the StudioIn Effect lanes you edit a show effect by effect on a timeline. You start in the Studio with a mood and then refine single spots in Effect lanes.Summary
- Look programmer: Static Looks like on a lighting consoleWhen you open a Static Look in Table, you get the look programmer: every fixture is a row, every channel a column – intensity, color, strobe, position, movement, gobo, prism, focus and everything else. Thru is hatched. On the right you set everything the selected fixtures can do – across all groups.Summary
- How Effect lanes are laid outEffect lanes have four areas: the preview at the top left, groups and tools on the right, and the timeline below. You save in the header at the top. For songs the lanes sit right in the Song Studio at the Everything level.Summary
- Editing lanes and clipsThe timeline shows one or more layers (lanes) per fixture group. Clips sit on them: colored bars that play an effect for a certain time.Summary
- Master lane and color palette changesThe master lane affects all fixture groups at once. Use it to set a base mood, e.g. a cool verse and a warm chorus, and add accents in the groups on top.Summary