
Floor plan and surfaces from photos
With a floor plan, the hall gets the right size and the plan lies on the floor to scale. Tables, stage and bar from the plan help you place your setup. With “Surface from a photo” you use the venue's real wallpaper, tiles or carpet as a tile.
Put a floor plan on the floor
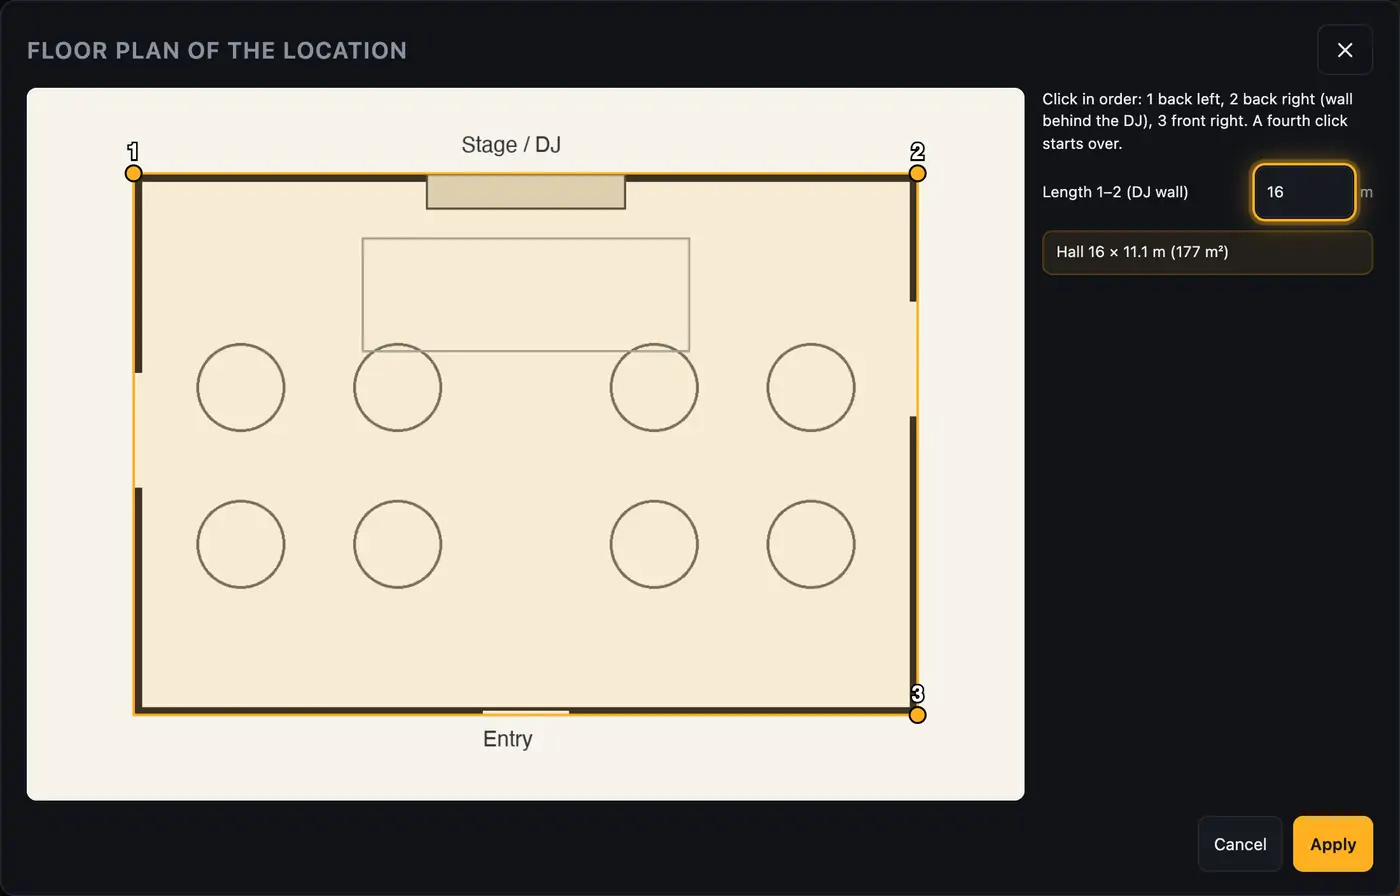
- Click “Floor plan” and drag the plan as an image (JPG or PNG) onto the area, or click it and pick the image.
- On the plan, click three corners of the hall in order: 1 back left, 2 back right (wall behind the DJ), 3 front right. A fourth click starts over.
- Under “Length 1–2 (DJ wall)”, enter the real length of the wall behind the DJ in meters. Below it you see the hall size, e.g. “Hall 14 × 22 m (308 m²)”.
- Click “Apply”. The hall takes its width and depth from the plan, the plan lies on the floor, and the view jumps to the top view.
- In the “Floor plan” block of the “Location” area, set “Plan” to “on the floor” or “hide” and adjust the “Opacity”. “Set corners again” reopens the plan, “Remove floor plan” takes it out.
More from “Fixtures, stage & 3D”
- The workbench: setting up the visualizer with the toolbar on the leftThe visualizer has a new layout: instead of one long sidebar and lots of buttons at the top, there is a toolbar on the left with seven areas. Only one area is open at a time, and the 3D view stays large next to it. At the top you see which location and which setup are loaded, and the search gets you to any function in two seconds.Summary
- Opening and using the 3D visualizerThe 3D visualizer shows your lights on a virtual stage. You see what SoundSwitch or Droplit is sending to your fixtures right now, and you can rebuild your real setup.Summary
- Fixtures & stage in Droplit“Fixtures & stage” is the full 3D visualizer right inside Droplit. This is where you set up your stage and hide fixtures that your shows shouldn't use.Summary
- Choosing the source: SoundSwitch, Designer or test patternAt the top right of the 3D view you choose where the light values come from. You either watch live what SoundSwitch sends to your fixtures, or the preview from Droplit.Summary
- Fixture details and DMX monitorClick a fixture to see its address, its mode and all channel values live. The DMX monitor adds all 512 channels of a universe at a glance.Summary