Saving to SoundSwitch
“Save to SoundSwitch” writes the show to exactly the slot you chose in the Overview. Then you open the project in SoundSwitch and find the show there.
Step by step
- Check the name at the top of the Studio.
- Briefly open another project in SoundSwitch, or quit SoundSwitch.
- Tap “Save to SoundSwitch”. Point at the button with the mouse first to see where it saves to.
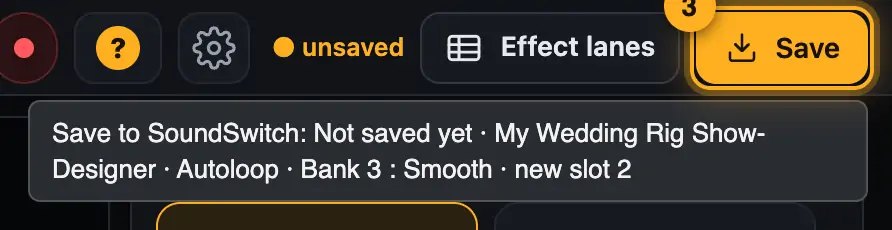
Hover over the button to see where it saves. - If Droplit asks “Is the project open in SoundSwitch?”, check and tap “Save now”. In the web version this question always comes the first time you save to a project (“It's closed – save now”), because the browser can’t see SoundSwitch.
- The window ““…” is saved” shows you the way in SoundSwitch:
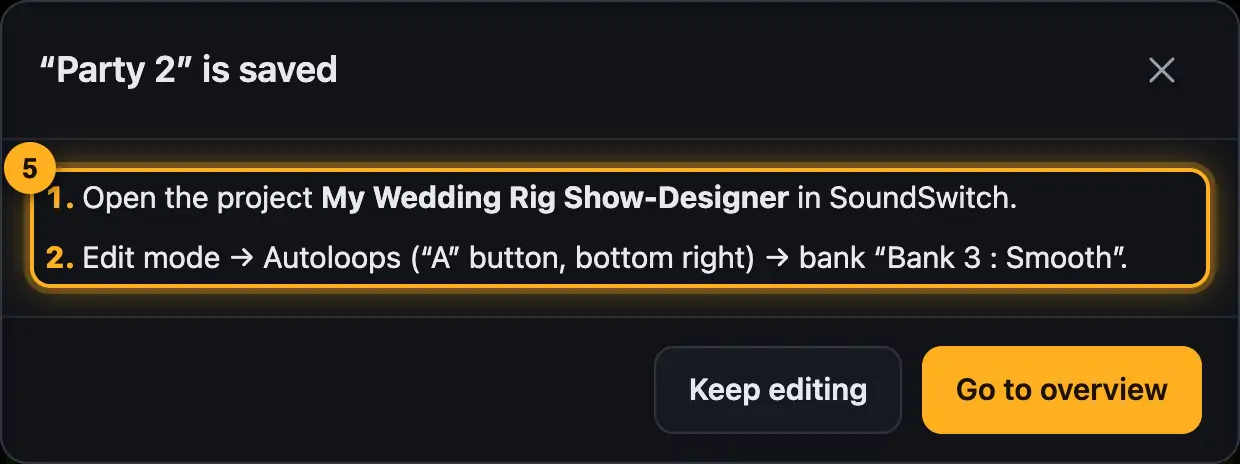
This tells you where to find the show in SoundSwitch. - Autoloop: Edit mode → Autoloops (“A” button, bottom right) → bank “…”.
- Static Look: Perform → Static Looks → Bank …, slot ….
- Song show: Load the song – the show plays along automatically.
- Tap “Keep editing” or “Go to overview”. In the Overview, the pad shows a check mark (“Just edited”).
- Open the project named in the window in SoundSwitch.
More from “Studio: designing shows”
- The Studio at a glanceIn the Studio you design a show for exactly one slot: pick a mood, adjust the colors and a few sliders, watch the preview and save to SoundSwitch. For most shows, that’s all you need.Summary
- Customize your layoutYou decide what the Studio shows: hide sections, collapse them, reorder them (also into the other column), drag their height and make their content larger or smaller. You can also make the preview taller and the columns wider. The Studio remembers all of it for every Autoloop, Static Look and song show.Summary
- Fill bank“Fill bank” fills empty pads with Autoloops and Static Looks that suit your event and your lights. You decide how much you want to do yourself: everything automatic, a quick look, pad by pad, or playing the show together live from scenes.Summary
- Just say it (AI)With “Just say it” you describe the light you want in one sentence, for example “first dance, romantic, rosé and gold, slow movers”. The AI then sets the mood, colors and sliders, and the designer builds the show as usual. You can also name single lights and moments, for example “uplights red, movers white, strobe in the second chorus”.Summary
- Show rules: limits, favorites and no-gosShow rules let you decide once what Droplit should use, what it should avoid and where the limit is. Everything it builds afterwards follows them: moods, song shows, the Fill assistant, the Look assistant and AI. You can lift any rule for a single case.Summary