Fill bank
“Fill bank” fills empty pads with Autoloops and Static Looks that suit your event and your lights. You decide how much you want to do yourself: everything automatic, a quick look, pad by pad, or playing the show together live from scenes.

Step by step
- What to fill? Everything, all Autoloop banks, one Autoloop bank, all Static Looks or one look bank. By default only empty pads. With “Replace existing ones”, taken pads are included.
- What for? Tap your event, for example wedding, birthday, corporate event, club or bar. This sets the bank themes (such as “Reception & dinner”, “Dance floor”, “Highlight”, “Romance & slow”) and the special moments for Static Looks.
- How do you want to work?
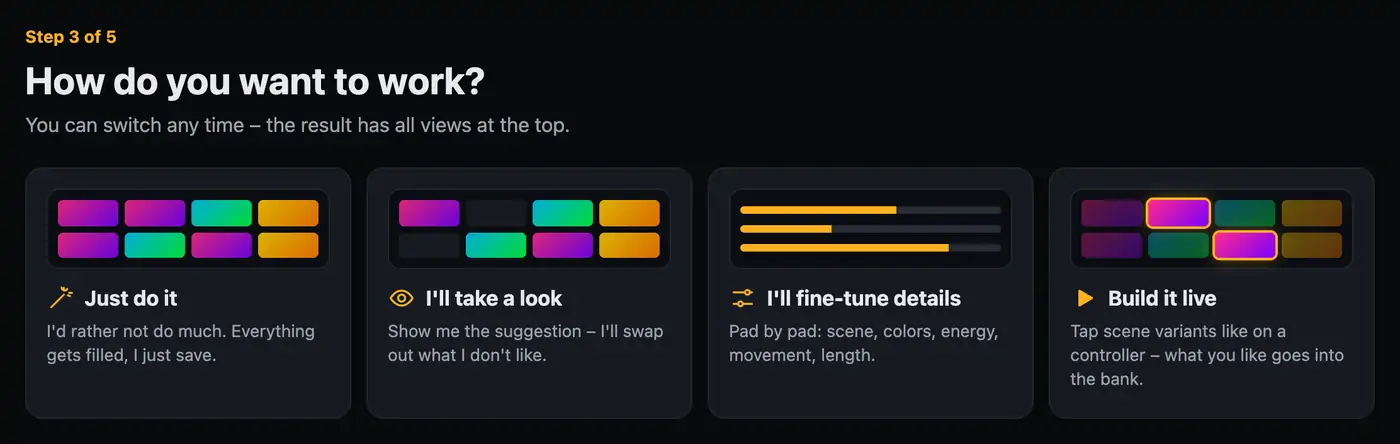
You decide how much you set yourself. - “Just do it”: no more questions. You see the suggestion and tap “Save to SoundSwitch”.
- “I'll take a look”: you go through the plan and swap out what you don't like.
- “I'll fine-tune details”: pad by pad with scene, colors, energy, movement and length.
- “Build it live”: the banks start empty. You play scene variants like on a controller and use ♥ to put what you like into the bank.
- What do you like? (not with “Just do it”) First how a bank is laid out (see below), then favorite colors, energy, moving head movement, strobe, gobos, base light, loop length and how many loops per bank. Everything is already set up for your event.
- Under “Favorite colors” you choose up to 4 color palettes. If you tap a fifth, the first one drops out. “Surprise me” lets each scene use its own colors.
- “Own colors” uses three colors you pick yourself, for example the couple's wedding colors. Tap the three dots under “Your three colors:”. All scenes then use these colors, with white added as an accent.
- “Calm scenes longer, peaks shorter” (under “Autoloop length”): Dinner, Chill and Romantic become 32 bars long, Tension and Wild 8 bars. All other scenes get the length you chose.
- Result: the 3D stage runs on the left, on the right there are three views: “Plan”, “Scenes live” and “Pad by pad”. Finally “Save to SoundSwitch”.
- Done: the window “Done – your banks are filled” tells you where to find everything in SoundSwitch. “Try it in Live mode” opens Live mode, “Keep filling” starts the assistant again at “What to fill?”, “Go to overview” takes you to your banks.
More from “Studio: designing shows”
- The Studio at a glanceIn the Studio you design a show for exactly one slot: pick a mood, adjust the colors and a few sliders, watch the preview and save to SoundSwitch. For most shows, that’s all you need.Summary
- Customize your layoutYou decide what the Studio shows: hide sections, collapse them, reorder them (also into the other column), drag their height and make their content larger or smaller. You can also make the preview taller and the columns wider. The Studio remembers all of it for every Autoloop, Static Look and song show.Summary
- Just say it (AI)With “Just say it” you describe the light you want in one sentence, for example “first dance, romantic, rosé and gold, slow movers”. The AI then sets the mood, colors and sliders, and the designer builds the show as usual. You can also name single lights and moments, for example “uplights red, movers white, strobe in the second chorus”.Summary
- Show rules: limits, favorites and no-gosShow rules let you decide once what Droplit should use, what it should avoid and where the limit is. Everything it builds afterwards follows them: moods, song shows, the Fill assistant, the Look assistant and AI. You can lift any rule for a single case.Summary
- Control it with your own ClaudeYou can also control Droplit from your own Claude (claude.ai, the desktop app or the phone app). Tell Claude what you have in mind, for example “Make me an autoloop for the first dance, rosé and gold, slow movers”. Claude then sets it up in your open designer, and you see every change live. It runs on your own Claude account and does not count towards the AI requests on this website.Summary